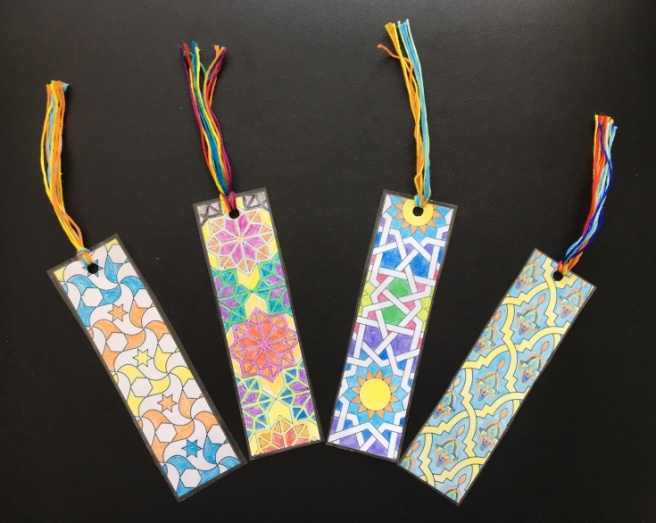
Learn about Islamic Art from around the world and colour your stresses away as you make beautiful, laminated bookmarks (without using a laminator).
After learning the colours in Arabic, you can apply your new vocabulary as you make these beautiful bookmarks.
This is a great craft for children and adults. I’ve used it in presentations about Islam to kids as well as in a DIY craft for teenagers. The intricate patterns, beautiful colours and professional finish that you get from laminating the bookmarks make the final product quite impressive.
Here’s what you need:
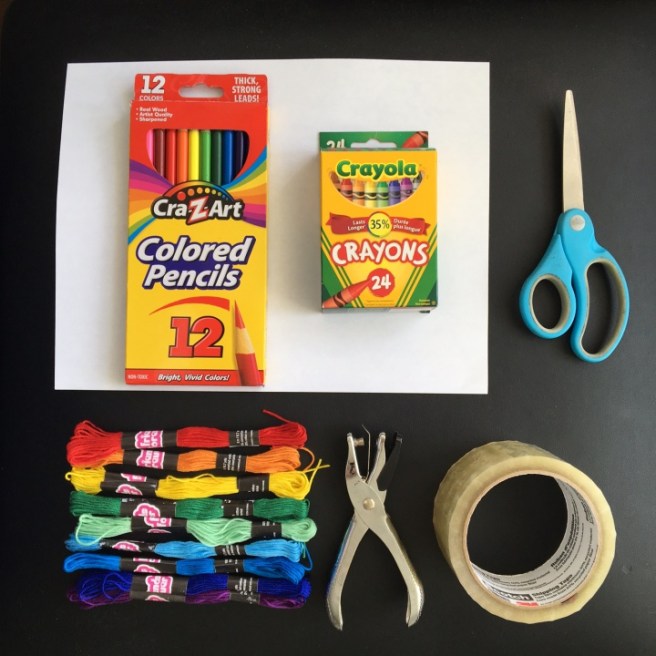
- regular letter-sized paper (8-1/2″ x 11″)
- coloured pencils or crayons (pencils work better but crayon works too — the two bookmarks on the left in the picture above were coloured with crayon)
- scissors
That’s all you need to give you a pretty nice bookmark but if you want to make it extra pretty and laminated with a tassle and all, you’ll also need:
- clear packing tape
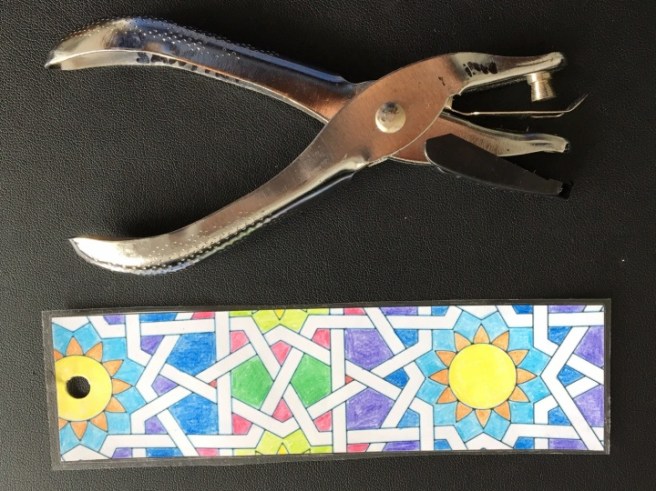
- hole puncher
- embroidery floss (available at Walmart, Dollarama or any craft store)
How to make the bookmarks:
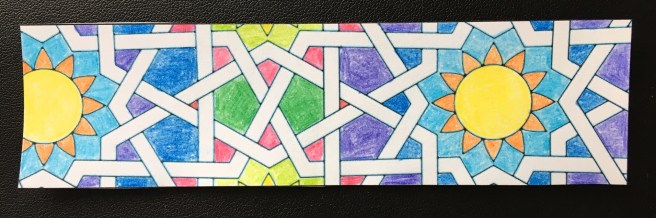
1. Download the Islamic Art bookmark patterns PDF file, print on regular letter-sized paper and colour the pattern of your choice.

2. Cut out the coloured bookmark.
Now, you could stop here and use the bookmark as-is. But if you want to make it more sturdy and durable and professional looking, continue with the next few steps to laminate the bookmark and add a tassle.
3. Laminate the bookmark with clear packing tape. What I like to do is cut a piece of tape a little longer than the bookmark, put that tape on the table, sticky side up, and carefully lay the bookmark on the tape. I do this again to laminate the other side of the bookmark.
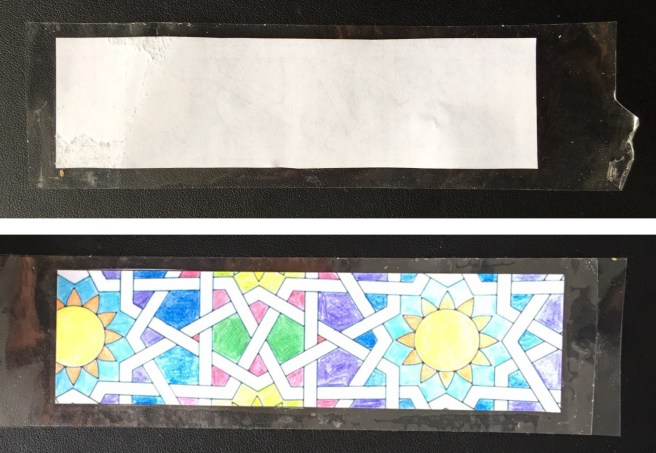
4. Trim off excess tape.
5. Punch a hole in one end of the bookmark.
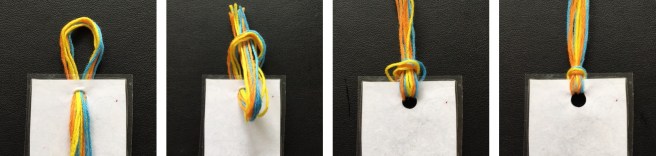
6. Cut 4-6 pieces of embroidery floss, about twice the length of the bookmark and attach them to the bookmark with a cow hitch/lark’s head knot.
Fold the embroidery floss in half and push the folded end through the hole you punched in the bookmark. Now thread the ends of the embroidery floss through that loop you just created. Pull to tighten the knot.
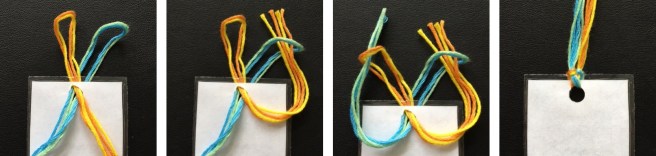
To make a fancier version of the knot, you can separate the embroidery floss into two groups and criss-cross your cow hitches.
Trim off excess embroidery floss.
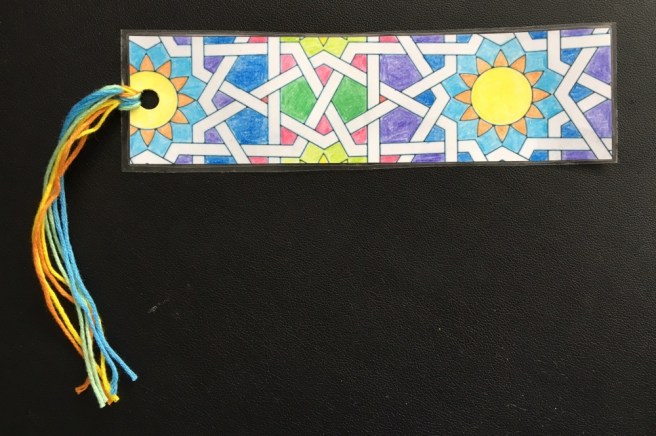
And now you can put your new Islamic Art bookmark to work, keeping your place in your favourite book and let it brighten your day with just how pretty it is!
Here again is where you can download the bookmark patterns.

Love the “lamination” – so simple!
LikeLike